 Save
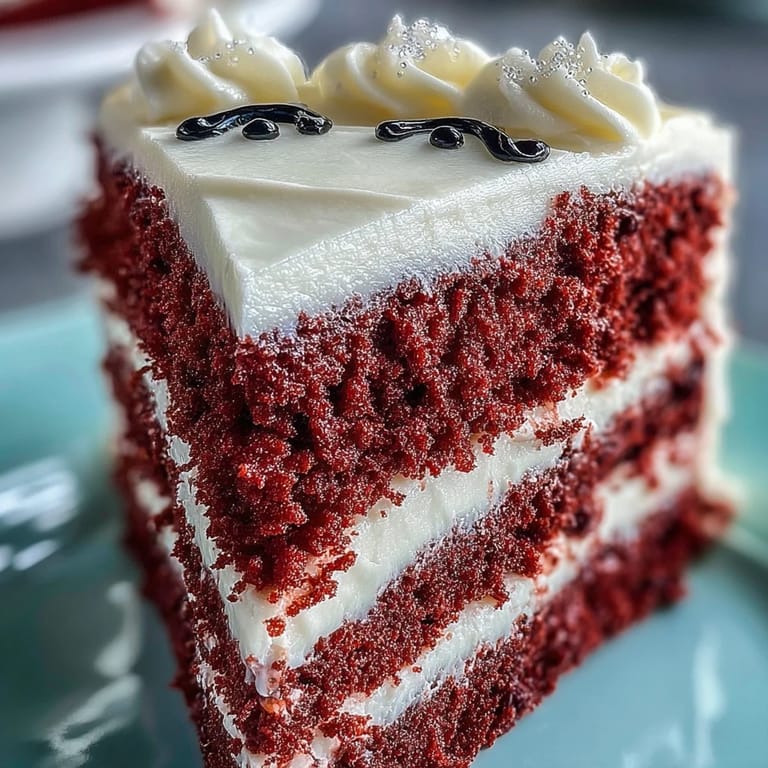
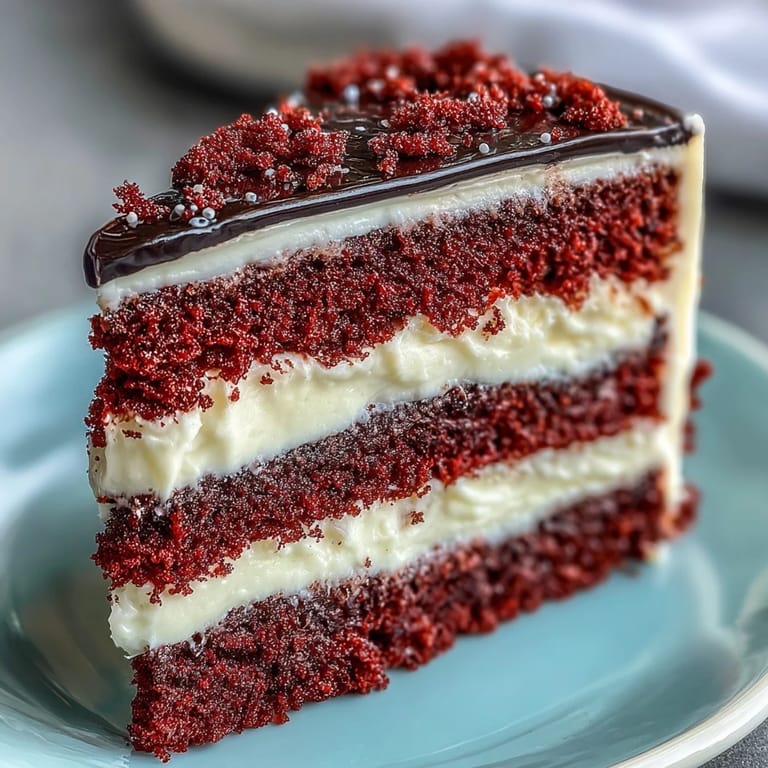
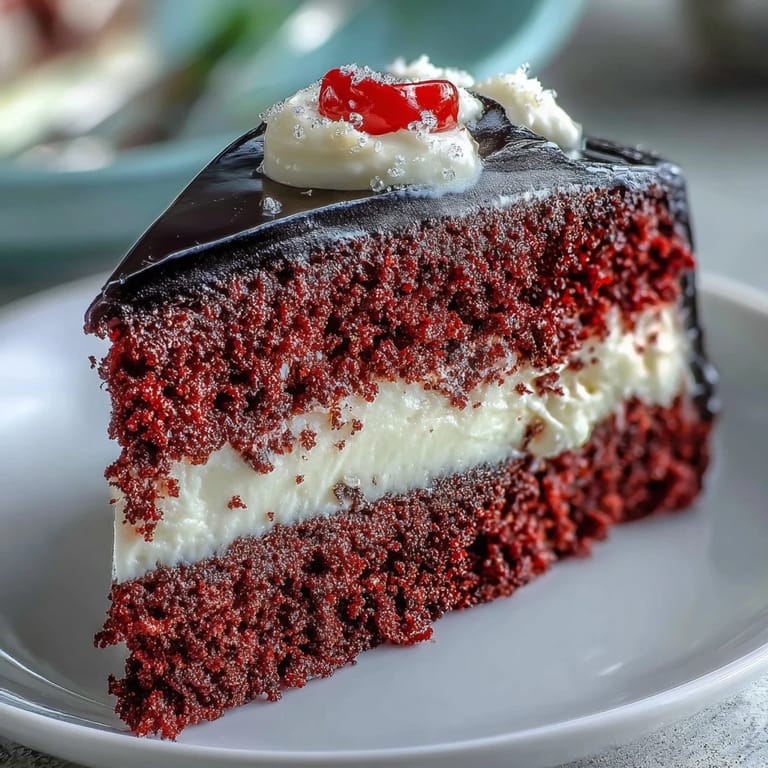
Save The kitchen counter was covered in black and white fondant scraps when my roommate walked in and asked if I'd started a crime scene investigation instead of baking a birthday cake. That bright red cake layer underneath all the cartoon features was actually the most perfectly moist red velvet I'd ever managed, and I think the buttercream was what finally sold her on stepping closer instead of backing out slowly.
I made this for my niece's animation-themed party last year and watched seven kids crowd around the cake table with their phones out, taking pictures before anyone even picked up a knife. Something about seeing a cartoon character rendered in edible form turns ordinary dessert into a little moment of magic, even for the grownups who pretend they're too old to care.
Ingredients
- All-purpose flour: Provides the structure for those tall, proud layers that won't collapse under fondant weight
- Granulated sugar: Sweetens while creating that tender velvety texture we're chasing
- Baking powder: Gives the lift needed for light, airy layers despite the density of food coloring
- Salt: Balances sweetness and enhances all the other flavors
- Unsalted butter: Room temperature butter creates the emulsion that makes cake tender rather than tough
- Large eggs: Bind everything together while adding richness and structure
- Whole milk: Creates moisture and tenderness in the crumb
- Vanilla extract: Rounds out the flavor profile so the red coloring isn't the only taste
- Red gel food coloring: Gel coloring delivers that deep crimson without thinning your batter like liquid versions
- Cream cheese: The tangy backbone of the buttercream that cuts through all that sugar
- Unsalted butter: Creamed with the cheese for a frosting that spreads beautifully and holds its shape
- Powdered sugar: Sifted first to prevent lumps in your silky smooth buttercream
- Black fondant: Essential for Betty's signature hairstyle that makes her instantly recognizable
- White fondant: Creates those dramatic eyes that give the cake its personality
- Red fondant: Forms the perfect pouty lips that complete the iconic look
- Edible pearl dust: Adds subtle shimmer that catches the light and makes the design pop
- Cornstarch: Keeps fondant from sticking to your work surface during those delicate rolling moments
Tired of Takeout? 🥡
Get 10 meals you can make faster than delivery arrives. Seriously.
One email. No spam. Unsubscribe anytime.
Instructions
- Prepare your pans and oven:
- Preheat oven to 350°F (175°C) and grease two 8-inch round cake pans, lining the bottoms with parchment paper for easy release later.
- Whisk the dry ingredients:
- In a medium bowl, combine flour, baking powder, and salt, then set this mixture aside while you work on the wet ingredients.
- Cream butter and sugar:
- Beat butter and sugar on medium speed for about 3 minutes until the mixture turns light and fluffy, incorporating plenty of air for a tender crumb.
- Add eggs and vanilla:
- Add eggs one at a time, beating well after each addition, then stir in the vanilla extract until fully incorporated.
- Combine wet and dry:
- Reduce mixer speed to low and alternately add flour mixture and milk in three additions, starting and ending with the flour while scraping down the bowl as needed.
- Add the signature color:
- Mix in red gel food coloring until the batter reaches a uniform deep crimson that feels cartoon-bold and celebratory.
- Bake the layers:
- Divide batter evenly between prepared pans, smooth tops, and bake for 25 to 30 minutes until a toothpick inserted in the center comes out clean, rotating pans halfway through.
- Cool completely:
- Let cakes rest in pans for 10 minutes, then invert onto wire racks to cool completely before attempting any frosting or fondant work.
- Make the buttercream:
- Beat cream cheese and butter together on medium speed until smooth, about 2 minutes, then gradually add powdered sugar one cup at a time.
- Finish the frosting:
- Increase speed to medium and beat until light and fluffy, about 3 minutes, then set aside until you're ready to assemble and decorate.
- Level and stack:
- Trim cake domes level with a serrated knife, place one layer on the cake board, spread buttercream on top, then carefully position the second layer.
- Apply crumb coat:
- Apply a thin layer of buttercream around the entire cake, then chill for 20 minutes to set before adding your final coat.
- Final frosting:
- Apply a final coat of buttercream and smooth sides and top with a cake scraper or offset spatula until the surface is pristine and ready for decoration.
- Roll black fondant:
- Dust your work surface with cornstarch and roll black fondant to about 1/8-inch thickness, then cut out Betty Boops hair silhouette using a template or freehand confidence.
- Create facial features:
- Roll white fondant and cut two large circles for eyes with small heart highlights, then roll red fondant for those signature lips and dust everything with edible pearl dust if desired.
- Apply the face:
- Once the cake is chilled and frosting is firm, gently drape the black fondant hair silhouette over the front, attach white eyes and red lips with small dabs of buttercream, then add eyelashes and eyebrows from extra black fondant.
- Final touches:
- Add a thin coil of red fondant for Betty's decorative headband and finish with any final touches like small sugar flowers or edible sparkles around the base.
- Rest before serving:
- Allow the decorated cake to rest at room temperature for 30 minutes before slicing and serving so all the flavors can meld and the fondant can soften slightly.
 Save
Save My cousin still talks about the year her daughter insisted on a Betty Boop birthday party, and how cutting into that cake revealed surprise red velvet layers that no one expected. The birthday girl kept asking if she could eat Betty's hair first, which I suppose counts as some kind of artistic compliment.
Making Fondant Work For You
Fondant can feel intimidating if you've never worked with it before, but the secret is keeping it covered when you're not actively using it so it doesn't dry out and crack. A light dusting of cornstarch prevents sticking without making the fondant too dry, and working quickly once it's rolled helps maintain that smooth, professional finish.
Timing Your Decoration
I've learned the hard way that trying to apply fondant to a slightly warm cake is a recipe for sagging decorations and frustration. Let your crumb coat set in the refrigerator for at least 20 minutes, and ideally give your final buttercream layer a brief chill too so the surface is firm but not rock hard when you start attaching those facial features.
Storage And Serving
This cake actually tastes better on day two because the flavors have had time to mingle and the moisture has redistributed evenly throughout those red velvet layers. Store in an airtight container at room temperature if serving within 24 hours, or refrigerate for up to three days but bring it back to room temperature before serving so the texture stays luscious.
- Press plastic wrap gently against cut surfaces to prevent drying
- Separate fondant decorations can be made up to a week ahead
- Always use a sharp serrated knife for clean slices through all the layers
 Save
Save There's something deeply satisfying about serving a cake that makes people laugh before they even take a bite, and this one delivers that joy in spades. Hope it brings as much happiness to your table as it did to mine.
Questions & Answers
- → How far in advance can I prepare the fondant decorations?
Fondant pieces can be crafted up to 24 hours ahead. Store them in an airtight container at room temperature, keeping pieces separated with parchment paper to prevent sticking. Avoid refrigerating as moisture can make fondant sticky and difficult to work with.
- → Can I make the red velvet layers ahead of time?
Yes, bake and cool the layers completely, then wrap tightly in plastic wrap and freeze for up to 2 weeks. Thaw overnight in the refrigerator before frosting. Bring to room temperature for easier handling during assembly.
- → What if I don't have experience working with fondant?
Consider practicing on a small piece of fondant first. Dust your work surface with cornstarch instead of flour to prevent drying. Work quickly but gently—fondant dries out fast. Keep unused portions covered. Simple shapes like circles and hearts are beginner-friendly.
- → How do I store the finished creation?
Due to the cream cheese frosting, keep refrigerated in a cake box or covered container. Bring to room temperature 30 minutes before serving for optimal texture and flavor. Best enjoyed within 3-4 days of assembly.
- → Can I use store-bought fondant instead of making my own?
Absolutely. Store-bought fondant works perfectly fine and comes in various colors including black, white, and red. It's often more consistent in texture and saves preparation time. Knead it briefly before rolling to make it pliable.
- → Why does my red velvet batter look brown instead of bright red?
The color deepens during baking. For vibrant results, use gel food coloring rather than liquid. Gel provides concentrated pigment without adding excess liquid to your batter. Start with 1 tablespoon and add more as needed.