 Save
Save My friend Sarah once brought a peanut butter pie to a dinner party and watched the whole table go silent the moment someone took that first bite. I realized then that some desserts don't need to be complicated to be unforgettable. This no-bake beauty comes together in just twenty minutes, yet tastes like you've been working on it all day. The creamy filling sits in a crunchy chocolate crust, and every forkful feels like a small luxury. Since that night, I've made it dozens of times, and it's never disappointed.
I made this for my book club one autumn evening, and someone joked that it should be illegal how easy it was to eat an entire slice. The chocolate-peanut combination has this way of making people pause mid-conversation, and I loved watching everyone go back for seconds without asking if there was more. That night taught me that sometimes the simplest recipes create the most memorable moments.
Ingredients
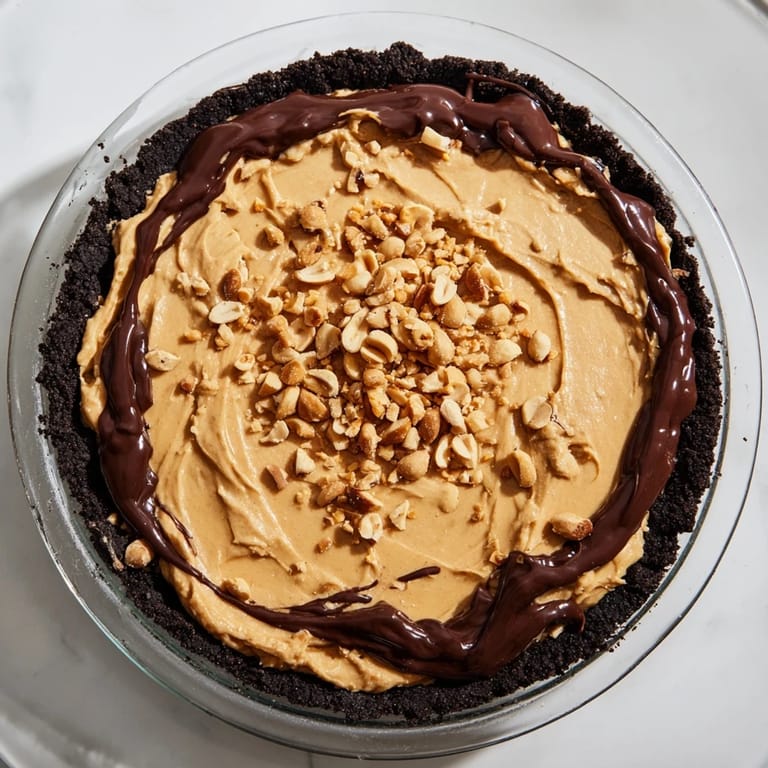
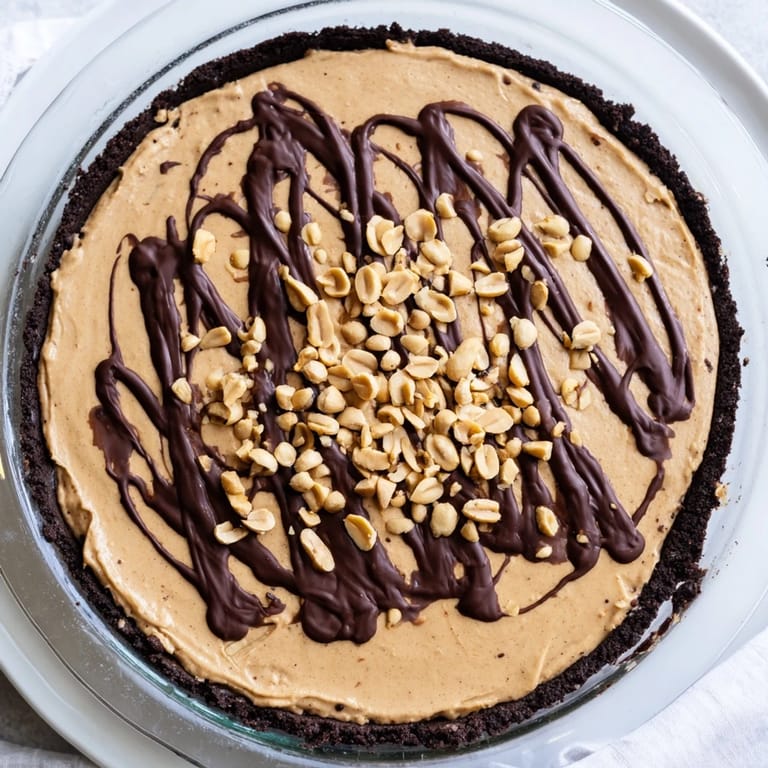
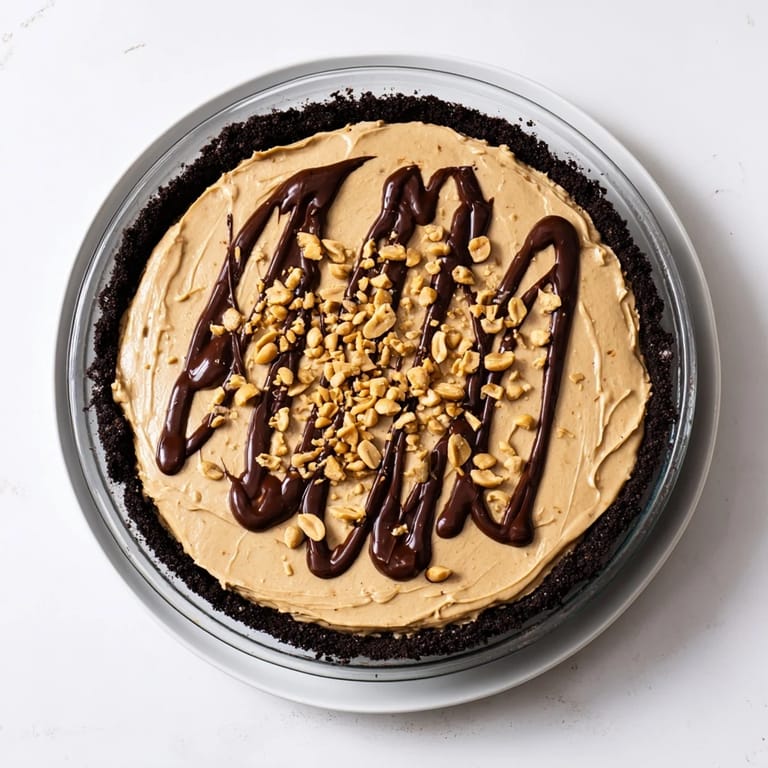
- Chocolate sandwich cookies, finely crushed (about 20 cookies or 200g): The foundation of everything, and crushing them finely means they bind better with the butter and create an even crust that won't crumble when you slice.
- Unsalted butter, melted (4 tbsp or 60g): Acts as the glue that holds your crust together; melted butter distributes more evenly than cold, so don't skip the melting step.
- Creamy peanut butter (1 cup or 240g): This is where flavor lives, so choose a good quality one that you'd actually eat from a spoon, and avoid natural peanut butter which can make the filling grainy.
- Cream cheese, softened (8 oz or 225g): Softening it first prevents lumps and helps create that impossibly smooth texture that feels like velvet on your tongue.
- Powdered sugar, sifted (1 cup or 120g): Sifting breaks up any clumps so the filling stays silky, and the sugar sweetens without any grittiness.
- Heavy cream, cold (1 cup or 240ml): The secret to airiness; cold cream whips faster and holds peaks longer than room temperature cream.
- Vanilla extract (1 tsp): A small addition that rounds out the flavors and prevents the filling from tasting one-note.
- Salt (pinch): Enhances the peanut butter flavor and brings everything into balance.
- Heavy cream for topping (1/4 cup or 60ml): Transforms chocolate chips into a glossy ganache that drips beautifully over the pie.
- Semi-sweet chocolate chips (1/3 cup or 60g): Choose ones you like eating straight from the bag; that's your quality baseline.
- Roasted peanuts or chocolate shavings for garnish: The finishing touch that says you cared, plus the roasted peanuts add a welcome textural contrast.
Tired of Takeout? 🥡
Get 10 meals you can make faster than delivery arrives. Seriously.
One email. No spam. Unsubscribe anytime.
Instructions
- Make the crust:
- Combine your crushed cookies with melted butter in a bowl until the mixture looks like wet sand. Press it firmly into your pie dish, working it up the sides with your fingers until it feels solid and even.
- Prepare the filling base:
- Beat your softened cream cheese with the peanut butter, powdered sugar, vanilla, and salt until completely smooth and creamy. This takes about two minutes with an electric mixer, and you'll know it's ready when you don't see any streaks.
- Whip the cream:
- In a separate bowl, whip your cold heavy cream until stiff peaks form when you lift the whisk. This is the magic ingredient that makes the filling light instead of heavy.
- Combine with care:
- Gently fold the whipped cream into the peanut butter mixture using a spatula, turning the bowl as you fold rather than stirring aggressively. You want to keep all that air in the cream so the final filling stays fluffy.
- Fill and smooth:
- Spread the filling evenly over your chilled crust and use a spatula to smooth the top until it looks intentional. If you want it perfectly level, a flat spatula dipped in hot water and dried works beautifully.
- Add the chocolate topping:
- Heat your cream until steaming, pour it over the chocolate chips, and let it sit untouched for a minute. Then stir gently until you have glossy, pourable ganache, and drizzle it over the pie in whatever pattern makes you happy.
- Final touches:
- Scatter your roasted peanuts or chocolate shavings across the top while the ganache is still slightly warm so they stick. This is where you make it look like something special.
- Chill completely:
- Refrigerate for at least four hours, though overnight is even better because the flavors meld and the texture firms up perfectly. When you slice it, dip your knife in hot water and wipe it between cuts for clean, beautiful slices.
 Save
Save I'll never forget watching my daughter's face light up when she tasted this pie at her friend's house and asked if we could make it together the next weekend. We did, and even though she got more peanut butter on herself than in the bowl, she was so proud that she made something beautiful. That's when I realized this recipe isn't just about the dessert, it's about creating moments where people feel like they can do something impressive.
The Secret to a Perfect Crust
The crust is honestly the most forgiving part of this whole process, but there's a small technique that makes the difference between a crust that holds together and one that crumbles. When you press it into the dish, use the bottom of a measuring cup to compress it firmly, working from the center outward, then press carefully up the sides. This creates an even thickness that won't cave in when you fill it. If you let the crust chill while you make the filling, it sets up and becomes sturdy enough to support the creamy peanut butter mixture without any problems.
Why This Works as a Make-Ahead Dessert
One of my favorite things about this pie is that it actually improves with time in the refrigerator, unlike many desserts that are best served fresh. The flavors deepen overnight, the chocolate and peanut butter getting more integrated and complex, and the texture becomes firmer and more sliceable. I've made this three days before serving it, and honestly it was better than if I'd served it at the four-hour mark.
Customizing and Troubleshooting
Once you've made this a few times, you'll find yourself wanting to play with it, and that's where the fun begins. A swirl of caramel sauce right before chilling adds a sophisticated touch, or you can add a tablespoon of espresso powder to the filling for a mocha variation that's absolutely stunning. If your ganache topping seizes and becomes grainy, just add a tiny bit more cream and stir gently until it's glossy again.
- If your filling looks grainy after beating, you can gently strain it through a fine sieve to rescue it, though this is rare if your cream cheese was properly softened.
- Dipping your knife in hot water between slices keeps them clean and neat, and it also helps if the pie hasn't thawed slightly at room temperature for ten minutes first.
- This pie keeps beautifully in the refrigerator for up to five days, and you can even freeze it for up to two months if you cover it well with plastic wrap.
 Save
Save This pie has a way of becoming someone's favorite dessert the moment they taste it, and then they ask you to make it for every celebration. I love that it requires no special skills, just a little patience and cold ingredients.
Questions & Answers
- → How do I make the chocolate cookie crust?
Crush chocolate sandwich cookies finely and mix with melted butter. Press firmly into a pie dish and refrigerate before adding the filling.
- → What gives the filling its creamy texture?
The combination of creamy peanut butter, softened cream cheese, and whipped heavy cream creates a smooth and airy filling.
- → Can I prepare this dessert in advance?
Yes, chilling for at least 4 hours allows the filling to set properly, making it perfect to prepare ahead of time.
- → Is it possible to add a decorative topping?
Yes, warm heavy cream poured over chocolate chips creates a smooth ganache that can be drizzled, along with roasted peanuts or chocolate shavings.
- → How can I adapt this for a gluten-free option?
Using certified gluten-free chocolate cookies for the crust ensures the dessert is gluten free.