 Save
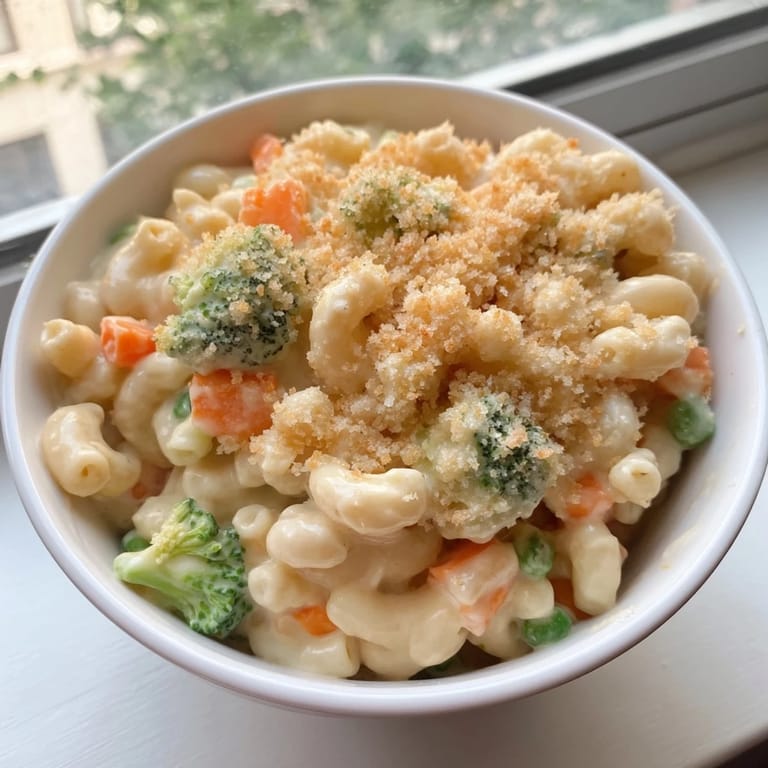
Save Last Tuesday my eight year old actually asked for seconds of broccoli. I almost fell off my chair. This mac and cheese has become my secret weapon for getting everyone to eat their vegetables without a single complaint at the dinner table.
I first made this on a rainy Sunday when I needed something that felt like a hug but also needed to use up the veggie drawer. My husband took one bite and said this needs to go into regular rotation, which is basically his highest possible praise.
Ingredients
- 300 g (10 oz) elbow macaroni: The curves hold sauce perfectly and feel nostalgic
- 1 cup broccoli florets: Chop them small so they distribute evenly throughout
- 1 cup carrots: Diced into small pieces they cook alongside the pasta and become tender sweet
- 1 cup frozen peas: Added at the very last minute so they stay bright and pop
- 2 tbsp unsalted butter: The foundation for your roux
- 2 tbsp all-purpose flour: Creates that silky thick base for the sauce
- 2 cups whole milk: Warmed slightly helps prevent lumps but cold works too if you whisk patiently
- 1 cup sharp cheddar cheese: The main flavor driver so buy something decent
- 1/2 cup mozzarella cheese: Adds that incredible melt factor
- 1/4 cup Parmesan cheese: Brings a salty depth that makes it taste finished
- 1/2 tsp mustard powder: The secret ingredient that makes cheese taste more cheesy
- 1/4 tsp garlic powder: Subtle background warmth
- Salt and black pepper: Taste your sauce before adding
- 1/2 cup panko breadcrumbs: Optional but that crunch on top is worth it
- 1 tbsp melted butter: Toss with panko for golden perfection
Tired of Takeout? 🥡
Get 10 meals you can make faster than delivery arrives. Seriously.
One email. No spam. Unsubscribe anytime.
Instructions
- Get everything ready:
- Preheat your oven to 180°C (350°F) and grease a 2-liter baking dish with butter or cooking spray.
- Cook the pasta and veg together:
- Boil salted water and add macaroni cooking for 1 minute less than the package says. Add broccoli and carrots in the last 3 minutes then peas in the final minute before draining.
- Make the roux:
- Melt 2 tablespoons butter in a saucepan over medium heat then whisk in flour cooking for 1 minute until it smells nutty.
- Add the milk:
- Gradually pour in the milk while whisking constantly. Keep stirring for about 4 to 5 minutes until the sauce thickens enough to coat the back of a spoon.
- Melt in the cheese:
- Remove from heat completely. Stir in all three cheeses along with mustard powder garlic powder salt and pepper until smooth and creamy.
- Combine everything:
- Pour the cheese sauce over your drained pasta and vegetables. Mix gently until every piece is coated then transfer to your prepared baking dish.
- Add the topping:
- Mix panko with melted butter and sprinkle evenly across the top if you want that crispy golden crust.
- Bake until bubbly:
- Bake for 20 to 25 minutes until the edges are bubbling and the top is golden brown. Let it sit for 5 minutes before serving.
 Save
Save This dish has become my go-to for new parents and sick friends because it reheats beautifully and actually makes people feel taken care of. There is something about homemade mac and cheese that says home better than almost anything else.
Making It Your Own
I have swapped in spinach bell peppers and even corn depending on what is in the fridge. The key is keeping vegetables cut small and pre-cooking anything that needs more than a few minutes to soften.
Gluten Free Options
My sister in law makes this with gluten-free pasta and a 1 to 1 gluten-free flour blend. She says the sauce comes out just as creamy and nobody can tell the difference.
Serving Ideas
A crisp green salad with acidic dressing cuts through the richness perfectly. Sometimes I serve roasted tomatoes on the side when I want something bright and sweet against the savory cheese.
- Warm plates make the cheese stay melted longer
- Extra cracked pepper on top adds nice contrast
- This freezes well for up to 3 months if you want to meal prep
 Save
Save Hope this becomes a regular in your house like it has in mine. Those empty plates and happy faces are pretty wonderful.
Questions & Answers
- → Can I prepare this dish ahead of time?
Yes, you can assemble the dish in the baking dish, cover it with plastic wrap, and refrigerate for up to 24 hours. Add 5-10 minutes to the baking time if cooking from cold. You can also freeze it for up to 3 months—thaw overnight in the refrigerator before baking.
- → How do I prevent a lumpy cheese sauce?
The key is whisking constantly as you add the milk to the roux. Keep the heat at medium and add milk gradually rather than all at once. If lumps do form, strain the sauce through a fine-mesh sieve before combining with the pasta.
- → What vegetables work well as substitutes?
Spinach, bell peppers, mushrooms, corn, and green beans all work beautifully. Fresh or frozen vegetables are interchangeable. Just ensure they're cut to similar sizes and blanch hard vegetables briefly before mixing to ensure even cooking.
- → Can I make this gluten-free?
Absolutely. Simply swap the elbow pasta for gluten-free pasta and use gluten-free all-purpose flour for the roux. The cooking method remains identical. Verify that your cheese and other ingredients are certified gluten-free if needed.
- → How do I get a crispy panko topping?
Toss the panko with melted butter and a pinch of salt before sprinkling over the dish. For extra crispiness, increase the oven temperature to 200°C (400°F) for the final 5 minutes, watching carefully to avoid burning.
- → What's the best way to serve this dish?
Let the baked dish cool for 5 minutes before serving to allow the sauce to set slightly. Pair with a crisp green salad, steamed broccoli, or crusty bread. Leftovers reheat well in a 160°C (325°F) oven covered with foil.