 Save
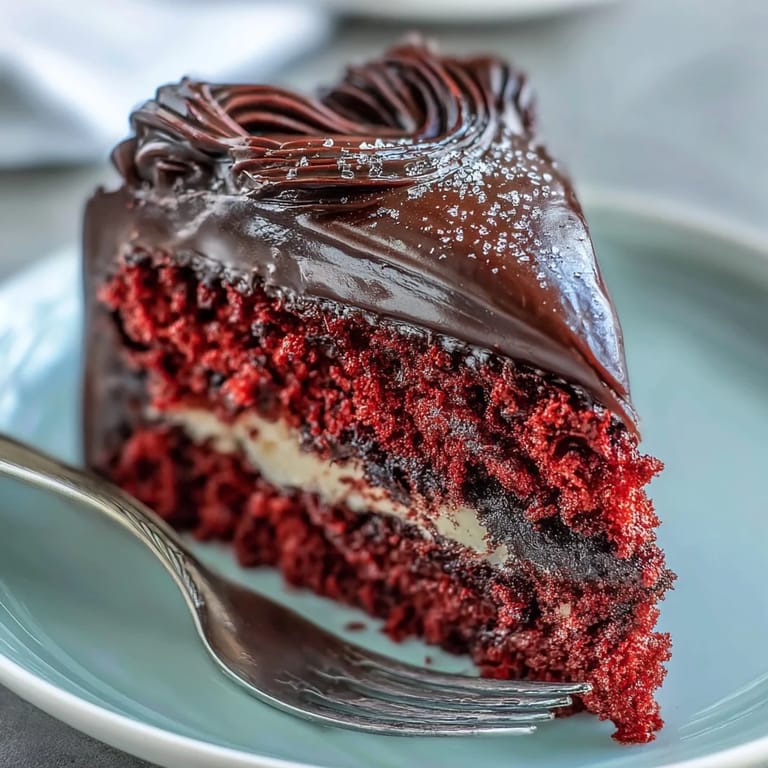
Save The afternoon sun hit my kitchen windows just right as I piped that final Betty Boop silhouette onto the red velvet heart. My daughter had been begging for a themed birthday cake for months, and something about the playful retro charm felt perfect for turning thirteen. That first slice revealed the deep crimson crumb against the dark chocolate outline, and honestly, it looked even better than I had dared to hope.
I made this cake again last weekend for my book club, and watching the women's faces when I lifted the chocolate silhouette from the parchment was pure magic. One of them actually gasped, and the conversation paused as everyone leaned in to admire the details. That is the kind of baking moment that keeps me coming back to the kitchen, flour in my hair and chocolate on my apron.
Ingredients
- Cake flour: The lower protein content creates that tender velvety crumb red velvet is famous for, so do not swap for all-purpose
- Natural cocoa powder: Just enough to give depth without overpowering the delicate red color or making the cake taste like chocolate
- Buttermilk: This is the secret to red velvet's signature tang and tender texture, reacting beautifully with the baking soda
- Red gel food coloring: Gel delivers that intense red without thinning your batter like liquid food coloring can
- Cream cheese: Full fat and room temperature is non-negotiable for that silky smooth frosting that spreads like a dream
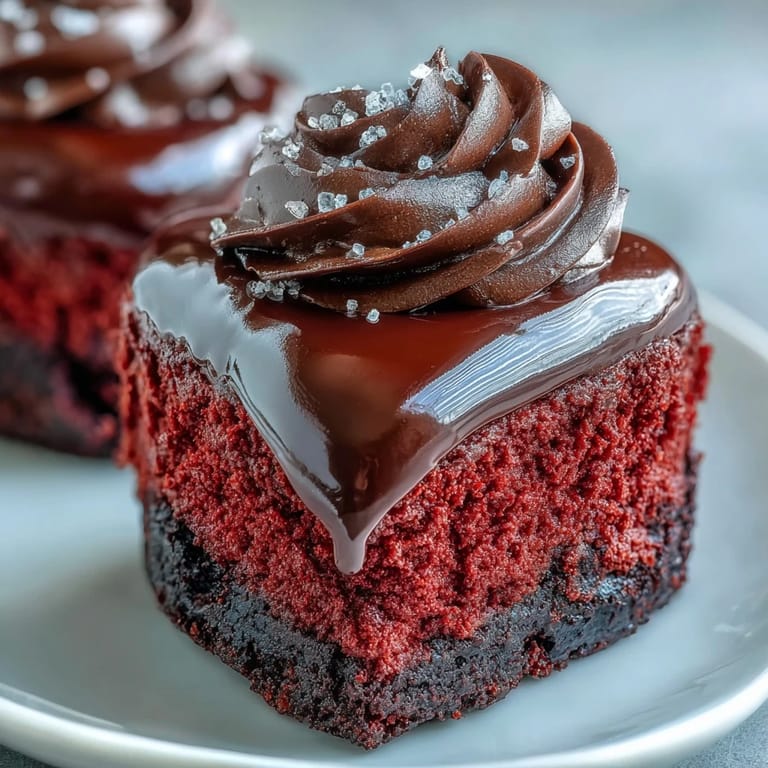
- Dark chocolate or candy melts: The contrast against red velvet is stunning, and dark chocolate balances all that sweetness
Tired of Takeout? 🥡
Get 10 meals you can make faster than delivery arrives. Seriously.
One email. No spam. Unsubscribe anytime.
Instructions
- Preheat your oven and prep those heart pans:
- Heat to 350°F (175°C), grease two 9-inch heart-shaped pans with butter, and line the bottoms with parchment paper so nothing sticks
- Whisk the dry ingredients together:
- In a medium bowl, combine the sifted cake flour, cocoa powder, baking powder, baking soda, and salt until everything is evenly distributed
- Cream butter and sugar until fluffy:
- Beat the butter for 1 minute, then gradually add sugar and continue for 2–3 minutes until the mixture is pale and fluffy
- Add eggs one at a time:
- Beat each egg into the batter completely before adding the next, scraping down the bowl so every bit gets incorporated
- Stir in the red coloring and flavorings:
- Mix in the red gel, vanilla, and white vinegar until the batter turns that classic vibrant red throughout
- Alternate dry and wet ingredients:
- With the mixer on low, add one-third of the dry ingredients, then half the buttermilk, repeating until everything is just combined
- Activate the baking soda:
- Mix the vinegar with baking soda in a small cup, watch it foam, then gently fold it into the batter for extra lift
- Bake until perfectly done:
- Divide batter between the pans, smooth the tops, and bake for 25–30 minutes until a toothpick comes out clean
- Cool completely before frosting:
- Let the cakes rest in the pans for 10 minutes, then turn them onto wire racks until they are completely cool to the touch
- Make the cream cheese frosting:
- Beat cream cheese and butter for 2 minutes until smooth, then gradually add powdered sugar, salt, and vanilla until fluffy
- Assemble and crumb coat:
- Level any domes, stack the layers with frosting between, then apply a thin crumb coat and chill for 10 minutes
- Add the final layer of frosting:
- Spread a smooth layer over the entire cake, creating swirls with your spatula or leaving it sleek and modern
- Create the chocolate silhouette:
- Place your stencil under parchment, pipe or brush melted chocolate over the outline, and let it set completely
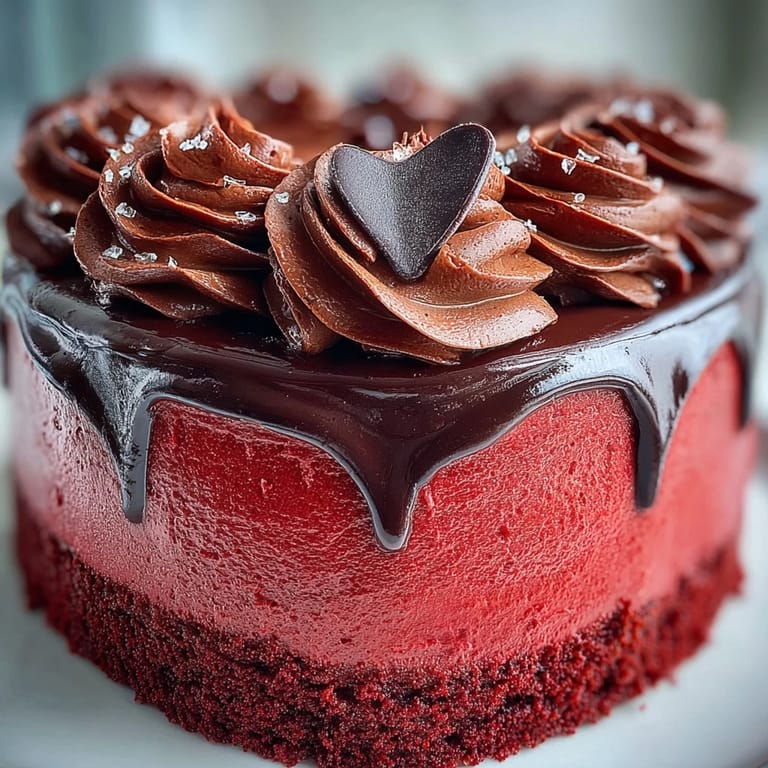
- Place the silhouette and decorate:
- Carefully peel the chocolate from the parchment, center it on the cake, and add rosettes or sparkles around the edges
 Save
Save The first time I tried making the Betty Boop silhouette, I rushed and the chocolate broke into three pieces right on top of the frosted cake. I improvised by arranging them artfully and pretended it was an intentional deconstructed look. Now I know that patience and letting the chocolate set completely makes all the difference between a disaster and a showstopper.
Getting The Perfect Red
Gel food coloring is absolutely worth the extra trip to the craft store or special order. Liquid coloring will never give you that deep velvety red without thinning your batter or requiring half the bottle. One tiny squeeze of quality gel delivers that restaurant quality color that makes people ask how you got it so vibrant.
Frosting Like A Pro
Heating your offset spatula under hot water, then drying it thoroughly, is the trick bakery decorators use to get that glass smooth finish. The warm metal melts the frosting just enough to erase any spatula marks, giving your cake that professional look. Just keep a towel handy to wipe the spatula between passes.
Make Ahead Magic
This cake actually tastes better the next day when the flavors have had time to meld and the frosting has softened into the crumb. Wrap unfrosted layers tightly in plastic and freeze for up to a month, or frost the entire cake and refrigerate it overnight. Just let it come to room temperature for about 30 minutes before serving for the best texture and flavor.
- Bring all ingredients to room temperature for at least 2 hours before starting
- Sift your powdered sugar twice to prevent any lumps in your silky frosting
- Warm your knife under hot water and wipe dry between slices for clean cuts
 Save
Save There is something magical about cutting into that red heart and revealing the playful silhouette inside. Every time I make this cake, I remember why I fell in love with baking in the first place.
Questions & Answers
- → What makes this cake red?
The vibrant red color comes from red gel food coloring, which provides rich hue without affecting the batter consistency or texture.
- → How do I create the chocolate silhouette?
Place your Betty Boop stencil under parchment paper, then pipe or brush melted dark chocolate over the outline. Let it set completely at room temperature or chill briefly before carefully transferring to the frosted cake.
- → Can I make this cake in advance?
Yes, prepare layers up to 2 days ahead and wrap tightly. Frost the same day as serving for best results, or apply crumb coat and finish with final layer of frosting within 24 hours.
- → Why use vinegar in the batter?
White vinegar activates the baking soda, creating a light and tender crumb structure. It also enhances the red color development and balances the sweetness.
- → How should I store leftovers?
Cover the cake and refrigerate for up to 4 days. Bring to room temperature for 30 minutes before serving to enjoy the soft texture and full flavor.
- → Can I use regular cocoa powder?
Natural unsweetened cocoa powder works best here. Dutch-processed cocoa may affect the color development and slightly alter the flavor profile.