 Save
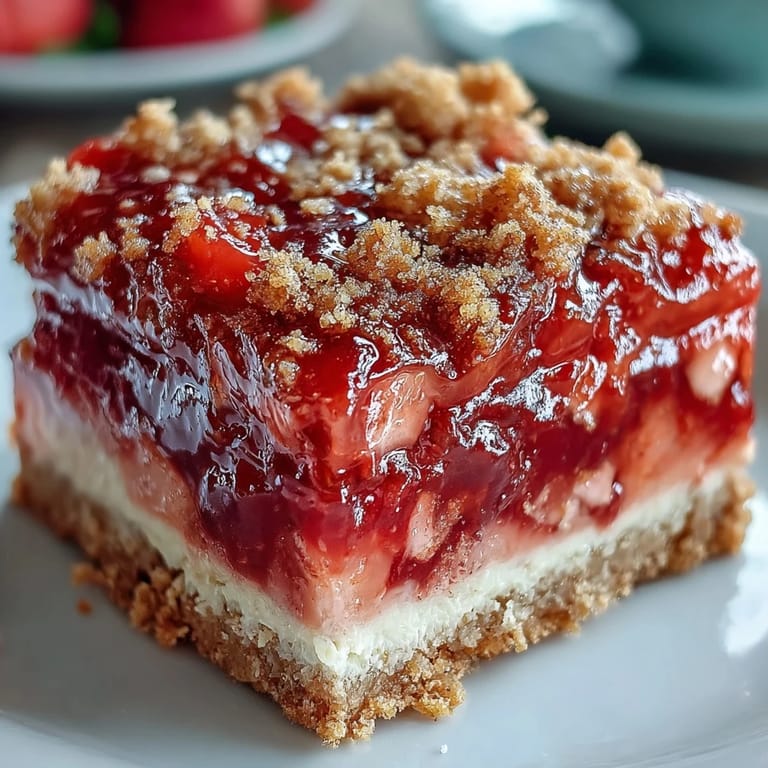
Save My neighbor knocked on the door one June afternoon with a basket of strawberries she'd picked that morning, their green caps still dewy. I had no grand plans for them, but when she mentioned she loved lemonade, something clicked—why not combine both into bars? That first batch came out of the oven golden and jammy, and by evening, half the neighborhood had tasted them. These strawberry lemonade bars became my answer to every potluck invitation that summer.
I made these for my daughter's book club last July, and she called me the next day saying everyone asked for the recipe. What surprised me wasn't that they loved the bars—it was that someone actually made them and brought them back the following week, stacked carefully in a tin. That's when I knew these weren't just another dessert.
Ingredients
- Unsalted butter (1 cup, softened): Use room temperature butter so it creams properly with the sugar, giving the shortbread that delicate, melt-in-your-mouth texture.
- Granulated sugar (1/2 cup for crust, 1 cup for filling): The first amount sweetens the crust while the filling gets most of the sugar to balance the tart lemon juice.
- All-purpose flour (2 cups for crust, 1/3 cup for filling): The crust flour needs gentle handling—overworking develops gluten and makes it tough instead of tender.
- Salt (1/4 tsp per component): This doesn't make things taste salty; it actually heightens sweetness and prevents the filling from tasting one-dimensional.
- Fresh strawberries (1 cup, hulled and diced): Choose berries that are fully ripe but still firm enough to dice neatly, and use freshly squeezed lemon juice nearby to brighten the flavor.
- Large eggs (3): These bind the filling and give it substance, so use room temperature eggs for better mixing.
- Freshly squeezed lemon juice (1/3 cup): Bottled juice tastes flat by comparison—fresh lemon is what makes these bars sing with that tart, refreshing quality.
- Lemon zest (1 tbsp, finely grated): This adds aroma and complexity that juice alone can't achieve, so grate only the yellow part, not the bitter white pith.
- Powdered sugar (for dusting): A light dusting at the end adds elegance and a hint of sweetness to cut the tartness.
Tired of Takeout? 🥡
Get 10 meals you can make faster than delivery arrives. Seriously.
One email. No spam. Unsubscribe anytime.
Instructions
- Prepare your workspace:
- Preheat the oven to 350°F and line your 8x8-inch pan with parchment paper, letting it hang over two sides—this is your escape route for getting the bars out whole. You'll feel so smart when you simply lift them out instead of wrestling with a spatula.
- Build the shortbread foundation:
- Cream the softened butter and sugar together for about two minutes until it looks light and fluffy, almost like pale clouds. Add the flour and salt, then mix gently until the dough just comes together—stop before it becomes overworked and tough.
- Bake the crust:
- Press the dough firmly and evenly into the bottom of the pan, smoothing it with your fingers or the bottom of a measuring cup. Bake for 18 to 20 minutes until it's lightly golden around the edges, then remove it from the oven.
- Process the strawberries:
- While the crust bakes, pulse the diced strawberries in a food processor or blender until they're a smooth puree, then strain through a fine sieve if you want to remove the seeds. This gives you that jewel-toned filling without any grainy texture.
- Whisk the filling:
- In a large bowl, whisk together the eggs, sugar, lemon juice, lemon zest, and strawberry puree until everything is fully combined and glossy. The mixture should smell bright and fragrant—if it doesn't, you probably used bottled lemon juice and might taste the difference.
- Pour and bake:
- Pour the filling over the still-warm crust, spreading it gently to the edges. Return the pan to the oven for 20 to 22 minutes until the center is just set—it should jiggle slightly in the very middle but be firm around the edges.
- Cool with patience:
- Let the bars cool completely in the pan on a wire rack, then refrigerate for at least two hours so the filling sets properly and slicing becomes clean instead of messy. This waiting time is when the flavors meld beautifully.
- Slice and serve:
- Use the parchment overhang to lift the entire block from the pan, then cut into 16 squares with a sharp knife, wiping it clean between cuts. Dust lightly with powdered sugar just before serving if you like that extra touch of elegance.
 Save
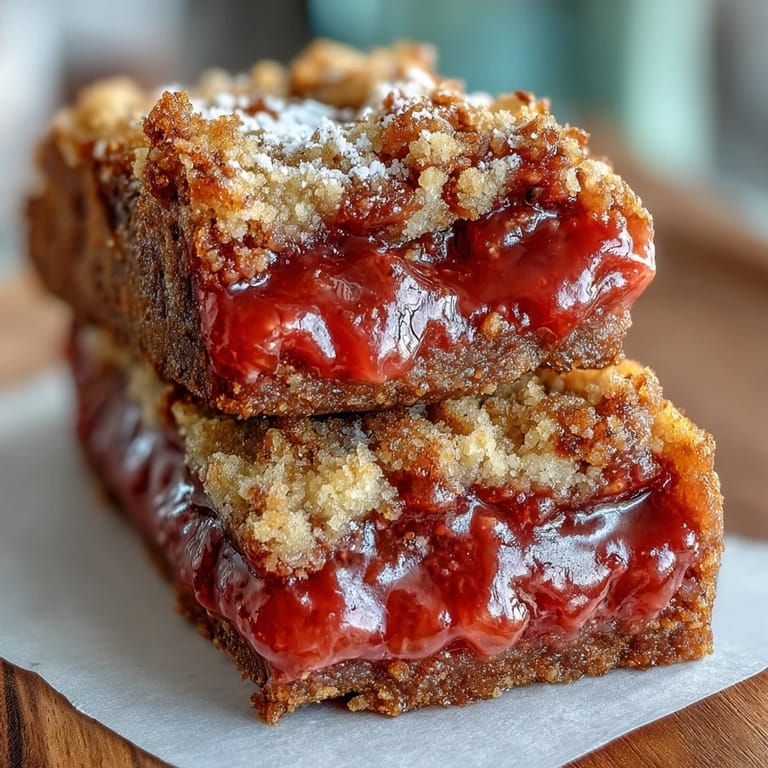
Save Years ago, I brought these to a summer wedding reception, and someone actually asked if I'd made them professionally. That moment made me realize that home baking has its own quiet power—something about bars made with care in a regular kitchen tastes different than anything that could come from mass production.
Why Fresh Lemon Makes All the Difference
I learned this the hard way after trying bottled lemon juice once and wondering why the bars tasted flat despite everything else being the same. Bottled juice has already oxidized and lost its bright, volatile aromatics that make lemonade taste alive. Squeezing two lemons takes maybe three minutes, and the flavor difference is honestly stunning—it's the difference between a decent bar and one people remember.
Variations That Work Beautifully
These bars are flexible enough to welcome different berries depending on what's in season or what's on sale at your farmers market. Raspberries give a more delicate flavor and naturally have softer seeds, while blueberries add earthiness without the same tartness as strawberries. You can also try a mix—half strawberry, half raspberry—which creates a more complex flavor profile that feels surprisingly sophisticated.
Storage and Make-Ahead Tips
These bars keep beautifully in the refrigerator for up to four days in an airtight container, making them perfect for planning ahead when you have guests coming. You can also bake them a day early and dust with powdered sugar just before serving so it doesn't disappear into the moist filling. A fun trick I discovered is freezing them between layers of parchment paper—they stay good for up to two weeks and thaw quickly on the counter if you need an emergency dessert.
- Always keep them refrigerated since the filling contains eggs and relies on cool temperatures for the right texture.
- If you're bringing them somewhere warm, pack an ice pack or cool pack in the transport container to keep them from getting too soft.
- A serrated knife works better than a chef's knife for clean slices, especially on the first and last bars where the edges can crumble.
 Save
Save These bars are my go-to when I want to share something that tastes like sunshine in a pan. They remind me that the best desserts are often the simplest ones, where quality ingredients and a little care create something memorable.
Questions & Answers
- → What type of crust is used for these bars?
A buttery shortbread crust made from softened butter, sugar, flour, and salt serves as the base, offering a crisp and tender texture.
- → Can I substitute other berries for strawberries?
Yes, raspberries or blueberries can be used for a different but equally delicious flavor twist.
- → How important is fresh lemon juice in this preparation?
Freshly squeezed lemon juice is recommended to provide bright, natural citrus notes that enhance the filling’s tanginess.
- → What is the best way to get smooth filling texture?
Puree the strawberries thoroughly and optionally strain them through a fine sieve to remove seeds for a silky filling.
- → How should these bars be stored after baking?
Cool completely, then refrigerate for at least 2 hours. Store in an airtight container in the fridge for up to 4 days.
- → Is there an optional garnish or topping?
Yes, dusting with powdered sugar before serving adds a delicate sweetness and attractive finish.