 Save
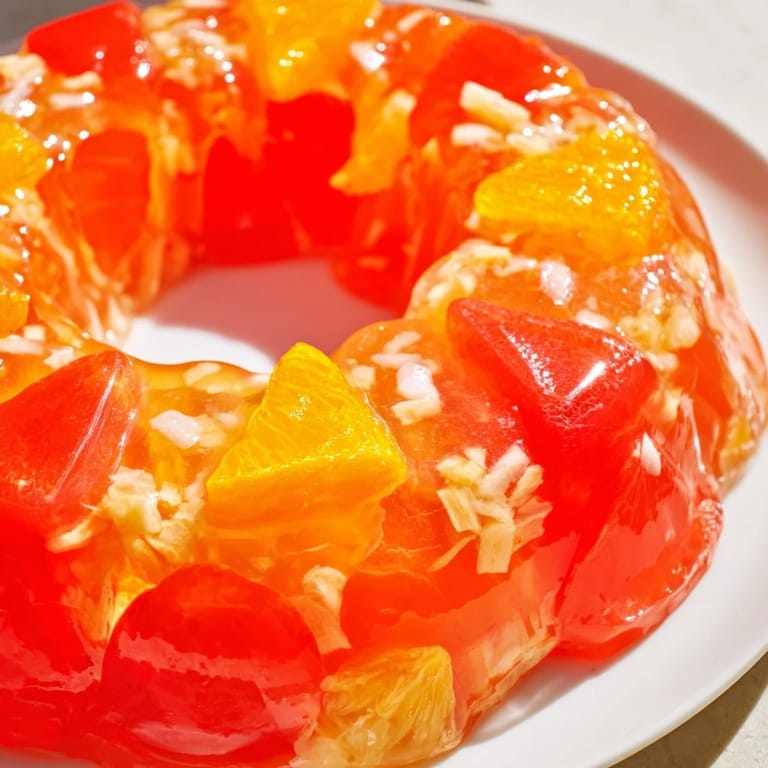
Save My mom pulled this shimmering tower of Jell-O salad from the refrigerator every summer, and I'd watch the light catch those jewel tones of red and orange as she turned it out onto her fancy glass platter. There was something almost magical about it—the way it wobbled and caught the light, the way every spoonful held a surprise of pineapple or a flash of grated carrot. Years later, I realized this wasn't just dessert; it was her way of saying the potluck mattered enough to make something that took patience and a little showmanship.
I made this for my daughter's school fundraiser potluck, nervous it might seem old-fashioned next to the modern desserts everyone else was bringing. It was gone in ten minutes, and three people asked me if I'd made it from scratch—as if that ambition alone would surprise them. That's when I understood: nostalgia done right never goes out of style.
Ingredients
- Flavored gelatin (strawberry or orange, 2 packages): The backbone of everything—pick a flavor that makes you happy, and don't skip the boiling water step or you'll have undissolved granules that ruin the silky texture.
- Boiling water: This matters more than you'd think; if your water isn't actually boiling, the gelatin won't fully hydrate and your salad will be grainy.
- Cold water: This stops the cooking process and sets you up for the next step without shocking the gelatin.
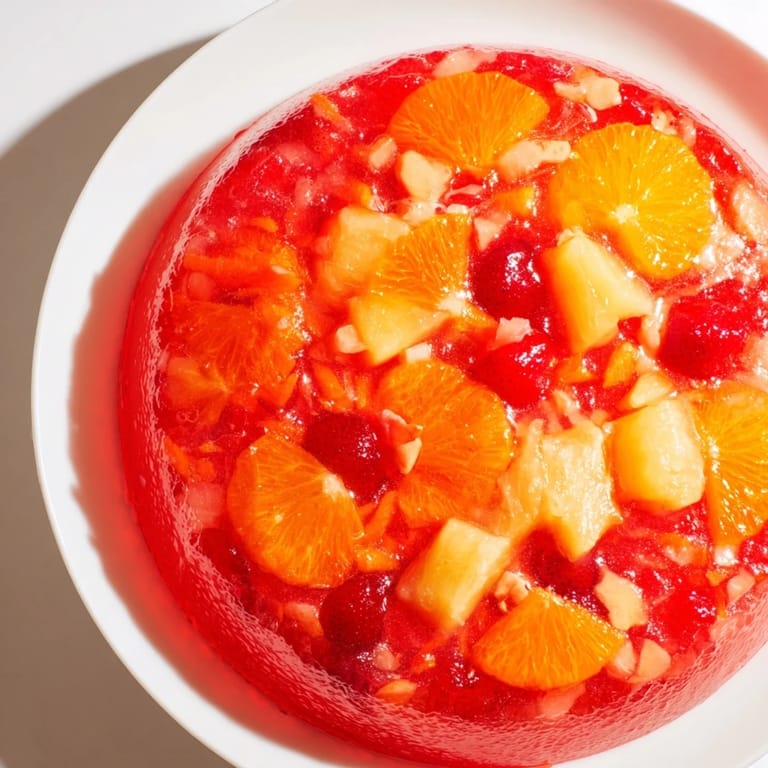
- Crushed pineapple, drained: Don't skip the draining or you'll end up with a watery mess; the juice breaks down the gelatin from the inside.
- Mandarin orange segments, drained: Canned is fine and honestly better than fresh for this—they stay intact and don't bleed color.
- Grated carrots: They add sweetness, crunch, and that vintage look that makes people smile when they see it sliced.
- Cottage cheese: This is the secret weapon that transforms it from candy to something with actual substance; small-curd is smoother and blends better.
- Chopped walnuts (optional): Toast them lightly first if you can—it deepens the flavor and adds a little sophistication to what might otherwise feel purely retro.
Tired of Takeout? 🥡
Get 10 meals you can make faster than delivery arrives. Seriously.
One email. No spam. Unsubscribe anytime.
Instructions
- Bloom your gelatin:
- Pour those two packages into a large bowl and let the boiling water hit them—you'll hear that little hiss and see the granules start to soften. Stir steadily for a couple of minutes until you don't see any grit at the bottom, and the mixture is completely clear.
- Cool it down gently:
- Add the cold water and give it a good stir, then let it sit at room temperature for about 20 minutes. This is the hardest part—don't rush it by putting it in the fridge, or you'll get lumps when you fold in the cottage cheese.
- Layer in the good stuff:
- Stir in your drained pineapple, oranges, carrots, and cottage cheese, making sure you're breaking up any clumps of cheese so it distributes evenly. If you're using walnuts, add them last so they don't sink to the bottom.
- Set it and forget it:
- Pour everything into your mold, smooth the top with a spatula, cover it loosely, and slide it into the fridge for at least 3 hours. You'll know it's ready when it jiggles just slightly but doesn't move around when you tilt the pan.
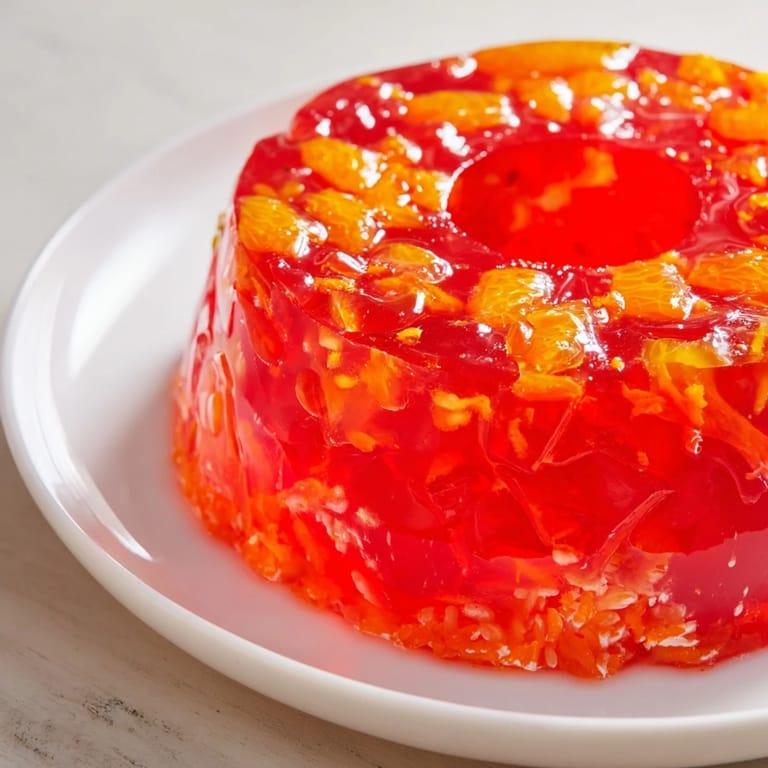
- The unmold moment:
- Fill a shallow bowl with warm (not hot) water and dip the bottom of your mold for just a few seconds—too long and the edges start to melt. Place your serving platter on top, take a breath, and flip it over with confidence.
 Save
Save My grandmother used to say this salad was proof that good food wasn't about being complicated—it was about showing up with something beautiful and sharing it with people you cared about. Every time I unmold one of these, wobbling and glistening under the kitchen light, I think of her and the joy she took in small, deliberate moments at the table.
Vintage Variations That Still Work
The beauty of this recipe is that it begs for improvisation without falling apart. Lime gelatin with drained pears instead of oranges creates a completely different mood, more elegant and less sweet, and it still feels just as retro when people recognize it. You can swap the walnuts for pecans, almonds, or leave them out entirely if you're cooking for someone with allergies—the salad stands beautifully on its own with just the fruit and cottage cheese.
Serving This the Right Way
Chill everything—your serving platter, your plates, even the serving spoon if you have time. The moment that Jell-O starts to warm up, it loses its charm and begins to weep. A small dollop of whipped cream on the side is the finishing touch that bridges the gap between retro and elegant, and it gives people permission to enjoy this unapologetically.
Why This Dish Endures
There's something honest about a Jell-O salad that modern cooking has forgotten—it asks nothing of you but patience and basic ingredients, and it rewards you with something that feels celebratory. It's the kind of dish that makes you feel capable in the kitchen without requiring restaurant skills or obscure ingredients.
- Make it a day or two ahead; it actually improves as it sits and flavors meld together.
- If your mold doesn't have a hole in the center, you can fill it with cottage cheese or whipped cream for extra drama when you unmold it.
- This travels beautifully to potlucks in its mold, and you only unmold it right before serving so it stays pristine.
 Save
Save This Jell-O salad has fed crowds and brought people together for generations, and it deserves respect—not as a joke or a relic, but as a genuine expression of care and a reminder that food doesn't need to be trendy to be meaningful.
Questions & Answers
- → How long does it take to set the salad?
Chilling the salad in the refrigerator for at least 3 hours ensures it sets firmly for easy slicing and serving.
- → Can I substitute the gelatin base?
You may use vegetarian gelatin alternatives to accommodate dietary preferences while maintaining the dish's texture.
- → What fruits work best in this dish?
Crushed pineapple and mandarin oranges provide a vibrant, sweet flavor and a colorful appearance, balancing well with the creamy and crunchy ingredients.
- → Are there variations for nuts?
Chopped walnuts add texture but can be omitted or replaced with pecans for nut-free or different nut preferences.
- → What equipment is needed for preparation?
A large mixing bowl, grater, measuring cups, mixing spoon, and a 6-cup mold or bundt pan are essential tools for making this dish.
- → Can this dish suit gluten-free diets?
Using certified gluten-free gelatin and ingredients ensures this dish is safe for gluten-sensitive individuals.